Those living in the West Coast of India habitually include coconut in their cuisine. Coconut is used in many forms in making curries, fried, snacks, sweets and desserts. Not just coconut masala, coconut milk also plays an important role in making many delicacies, veg or nonveg. Mangalorean Kori Ghasi, Kundapur Koli Thalna, Kerala Sadhyam, Payasam, Goan Rosachi Kadi and of course the pick me up Kokum Kadi. They all need coconut milk to prepare. GSB delicacy Valval and Brahmin dessert Rasayana also have added coconut milk in them. Coconut milk/cream of late has gained international importance by being one of the key ingredients in making Vodka and rum based cocktails and liqueurs.

In thesee modern times, we have seen coconut products like milk, cream, milk powder, desiccated powder and many more byproducts flooding the markets, on the shelves of super stores. Yet, traditionally extracted fresh coconut milk has its own taste and flavour. It makes the preparations very delicious and aromatic. More so, if right grading of coconut is used for extracting milk. Since my childhood, I have been watching my mother extract coconut milk from green fresh coconut manually grated on the coconut scraping stool, manually ground using the grinding stone and squeeze out the milk by straining through a muslin cloth. Today we have electric coconut scrapers and mixer grinders that make our job easy. Strainers with fine stainless steel or plastic sieve are also available in the market. Yet, obtaining green coconut is not so easy! Not many stores or vegetable vendors stock them, as they are fast perishable. Some may give whitish looking coconuts saying they are suitable, but the kernel might have grown and contain oil content, which does not give the same flavour as tender one. Those who have coconut trees in their garden are lucky, if the coconut plucker obliges and plucks couple of green coconuts and facilitates extraction of good quality coconut milk!
We are lucky that our coconut plucker Ananda came yesterday to pluck coconuts and I asked him to pluck a green one. He plucked one and also peeled it for me. It was looking big and heavy, but had lot of water inside and the kernel was rather tender and thin. Yet, the coconut milk I extracted tasted exactly like what my mother used to extract during my childhood days! We made Valval, delicious GSB style mixed veg curry with the milk extracted from that coconut today.
The art of grating/scraping coconut manually is not mastered by many youngsters from the the newer generation. We still belong to the older generation and I have helped my mother in cooking since our only sister, our eldest was married off as early as when I was 7 years old! I used to grate coconut, grind masala on the stone, prepare tea coffee and few simple snacks, make rice daalithove and upkari when I was in school, when mother was away at sister's town Shivamogga. Later when I was in PUC, I also remember doing voluntary work with my GSB friends at the Venkatramana Temple Car Street during the annual Rathotsava, grating coconuts in the early hours, soon after Small Rathotsava was over. There they have long benches with coconut scraping blades fixed at calculated gaps, and at a time 6-10 people can sit together and grate coconuts on one bench!
Meena still does coconut scraping manually, using the fantastic coconut scraping stool we got from Pilikula Heritage Village in 2009. She has demonstarted here, how to make coconut milk, starting from breaking the coconut using a 'Koiti/Katthi' or a sickle, drain and collect the coconut water for drinking, scrape the coconut, grind it in the mixer and extract thick and thin milk. Thick coconut milk is also called as coconut cream. It is the main base for curries, payasams and desserts. The thin milk is used in cooking vegetables and lentils or while grinding rice and daal for dosas and sannas. Of late, I have also made fine toddy, fermenting thin coconut thin milk by adding sugar and yeast. That toddy can be used for making sannas, aapams and dosas.
To Extract 4 Cups of thick coconut milk, you need a medium size coconut. Since the green coconut we used had thick kernel, we got just 2 cups of thick coconut milk and 2 cups of thin milk. More fibrous kernel yields more milk but also adds some percentage of oil content to the milk!
Implements you need:
Sickle or an iron rod for breaking the coconut
Coconut Scraping Board/Stool
A wide platter for collecting grated coconut.
Mixer/Grinder
Strainer with Fine Stainless or plastic mesh, or 2 ft x 2 ft wet muslin cloth
A spatula, spoon or ladle.
1 wide mouth vessel for collecting coconut water.
2 vessels of 1 liter capacity each for collecting thick and thin milk separately.
Ingredients:
Coconut - 1 medium(or 4 Cups grated coconut)
Water - 4-6 Cups
Method:
Remove the fibers sticking to the peeled coconut and wash the coconut under tap water.
Cup your left hand and hold the coconut firmly as in the picture.
Using the blunt edge of the sickle blade, tap on the middle portion of the coconut shell on the segment between two ridges using moderate force.
Turn the coconut and tap on the second segment between the ridges.
Turn again and tap on the third segment.
Now the coconut shell must have cracked.
Insert the tip of the sickle blade, widen the crack between two coconut halves, hold the coconut above the vessel and drain the water.
You can either consume this fresh sweet coconut water immediately, or keep it in the fridge for a day, and use it for grinding rice to make akki rotti, neeru dosa, undi or string hoppers.
You can also make toddy with coconut water.
Once the water is empty, separate the two halves.
Using the coconut scraper, grate the kernel and collect the grated coconut.
If you are using the grated coconut later, place the platter covered, in the fridge for 8-10 hours.
Take the grated coconut and 1-2 cup of water in the grinding jar of the mixer or a stand alone grinder.
Close the lid and run the mixer/grinder at slow speed for 2 minutes and at medium speed for 2 minutes.
Check to see if the mass is ground to a smooth paste.
If not, run the mixer at medium speed for another minute or so.
Pour the ground paste into the strainer little by little, use the spatula or spoon to stir the contents and extract milk.
Alternatively you can pour the ground paste into the wet muslin cloth, tie it securely and squeeze out the milk.
Once you get the thick milk, transfer the residue back into the mixer, add two more cups of water and run the mixer for 1-2 minutes.
Pour the contents into the strainer or muslin cloth and extract thin milk into a separate vessel.
repeat the process again if you feel the residue has some more thin milk to yield.
Use in recipes as per instructions.
Store the thick and thin milk in the fridge for 4-6 hours if you want to use them later for cooking, but don't keep them in the freezer.
Before partition of India, Karachi was an Indian province where Sindhis hailed from. Sindhis are experts in cooking and baking. Some of the best restaurants and bakeries in India are owned by the enterprising Sindhis.
One such bakery in Hyderabad by name Karachi Bakery, is famous for the Karachi Fruit Biscuits. Not just fruit biscuits, but most of their baked goodies are fantastic. I am a fan of Karachi Fruit Biscuits, ever since my young friend Anitha Prabhu brought them from Hyderabad three years ago for me. They are delicious, they crumble and melt in the mouth, they release exotic flavours of butter and added fruits and nuts within, as you relish them!
I have been purchasing those fruit biscuits since couple of years, after they started marketing them in Mangaluru. We get them in half a dozen stores here. However, my passion for cooking and baking made me try and bake these goodies at home some months ago. I had some dough left over from making some other cookie, which I used for making them. They turned out promising, but not as tasty and delicious as Karachi Bakery made them.
I didn't lose heart. I have been trying to bake various kinds of biscuits at home and succeeded in understanding the right formula to make different kinds of butter cookies. Thus my confidence got better, and finally I decided to try my luck with Karachi Fruit Biscuits.
Online recipes were there, but each one had different ingredients and method of making them. Most of them had the method of making a log with the dough and then slicing off cookies and baking them. That was way too different than what Karachi Fruit Biscuits looked like. Just adding tutti frutti didn't appeal me. Shape and texture also matter when I attempt to perfect something. Vahchef channel had a very good recipe, but adding milk powder and custard powder is a big NO for me, as both the ingredients leave a kind of odd feeling in the mouth after you eat the cookies. I also wanted to come out with an easy recipe to make these cookies, so that home makers are benefitted. Thus I came out with my own formula and these cookies look and taste almost as good as Karachi Bakery biscuits. Of course we don't have machines to shape or cut them Hence the shape, size and thickness may vary from piece to piece. All said and done, the satisfaction of making fresh Karachi fruit Biscuits at home and hearing all praises for a job well done makes it worth the effort!
Few precautions to follow:
1. Make the dough stiff and firm, not sticky.
2. Don't add too much liquids to the dough. The moisture within the butter and the candied papaya(tutti frutti) and the fruit syrup you are adding is sufficient. For that extra flavour and vegetable protein, add just a tablespoon or so of milk to the dough.
3. Don't add too much artificial flavouring or sugar, and avoid adding colour. Tutti ftutti has added colour and sugar syrup within.
4. Add vanilla essence, any one fruit syrup and any 2 fruit essences mentioned under ingredients. Too many fruit flavourings may spoil the taste and texture of the cookies.
5. Don't leave the dough exposed to room temperature for long. Butter starts melting and the cookie dough becomes soft and sticky, making them hard and crunchy when you bake them. Roll the dough, cut into cookies and transfer them into the hot oven for baking within 10-15 minutes. If you want to bake them later, transfer the cut cookies layered with butter paper in between on a platter into the fridge, and bake them when you feel comfortable.
6. Don't add too much tutti frutti, raisins or nuts. That will make the cookies crack and lose texture.
7. Home made cookies ideally can be made 1/2 centimeter thick. If you make them 3/4 centimeter thick, allow the cookies to bake for 2-3 minutes more in the oven than the suggested timing.
8. Allow the cookies to cool down on a rack completely after baking. Only then store them in an air tight jar.
9. Well made cookies turn out soft but not soggy, they just crumble and melt in the mouth.
Follow the above tips, and you can confidently and proudly project yourself as a home baker who has perfected the art of making these fantastic Karachi Bakery Biscuits. All the best and happy baking!
Ingredients:
Refined Flour(Maida) - 1 cup
Baking Powder - 1/2 Tsp
Baking Soda - 1/4 Tsp
Salt - 1/8 Tsp
Butter - 40 Gms
Raisins - 1 Tbsp
Cashewnut 1/8 Bits - 1 Tbsp
Tutti Frutti(preferably red) - 1/3 Cup
Vanilla Essence - 1 Tsp
Raspberry/Rose/Orange/Pineapple Essence(any two) - 1/2 Tsp each
Pineapple/Raspberry/Rose/Orange Syrup(any one) - 1 Tbsp
Powdered Sugar - 1/4 Cup(maximum 1/3 cup)
Milk - 1 Tbsp(maximum 1 and 1/2 tbsp)
Method:
Sift refined flour, salt, baking powder and baking soda together.
Chop raisins into tiny bits.
Rub butter into the flour mixture with your finger tips to form crumbs.
Add the dry fruits, all the essence, pineapple syrup, powdered sugar and knead lightly into a pliable dough, adding milk spoon by spoon.
The dough should be loosely kneaded into a ball, and must be soft but non-sticky, rather brittle.
Heat oven at 180°C for 10 minutes.
Dust the kitchen platform work area with flour, roll the dough ball into a 1/2 centimeter thick 9" square sheet.
Flatten and shape all the four sides properly with a knife or spatula.
With a sharp knife, cut into 1.5 inch square burfi like pieces.
You should get about 36 pieces of 1.5" square.
Place them on a baking tray greased or lined with parchment paper, bake at 180°C for about 12 mins.
if you want, you can make the biscuits 3/4 centimeter thick, but bake them for 2-3 minutes more.
When the biscuits turn golden brown on the upper surface, it is time to remove them from the oven and allow to cool down on the rack.
Once completely cool, store in an airtight jar.
That day in October 1997, trekking in the Kali Gandaki region of Nepal, on day 2 we reached a place called Tatopani, where we found a good lodging by name 'Old Kamala Guest House' and rested there. There they had electric supply and even a microwave oven! For dinner, skipping normal Nepali menu, we ordered à la carte. They made excellent 'Apple Momos' and Chicken Noodle Soup. I tasted apple momos for the first time in my life there!
Apple momo is a half moon shaped deep fried crispy snack with a crumbly outer crust resembling samosa and inner apple stuffing tasting sweet like Gujiyas/Nevriyos. The apple stuffing had dark brown colour, sticky in appearance and had a hint of cinnamon flavour within. They make at least 6" long momos and couple of momos followed by a bowl of vegetable sweet corn soup, was really filling!
Reminiscing over the taste of Apple Momos tasted there, in December 1997 I told Meena that we can make it at home. I told her the probable ingredients that go into them. We made them at home, but it was not as good as what we had eaten there in Nepal. The outer cover was not very encouraging. Stuffing was good with all the flavours, but we used normal sugar that we caramalised along with apples and added cinnamon powder. The idea of making perfect outer cover and the stuffing came to my mind much later, after we succeeded in making Punjabi Samosas, and Meena started using Demerara Sugar in baking.
I was in search of green cooking apple, but in Mangalore we hardly see them in the local markets. I got regular red Himachal Apples, but they were not too sweet. That served my purpose, and I added lemon juice to make them taste as tangy as cooking apples. Addition of bread crumbs dehydrates the apple chunks and makes the stuffing firm even after deep frying the momos.
Now you may wonder what are momos. Momos are Tibetan dumplings with savoury veg or seafood or nonveg or sweet fruity filling, normally steamed, sometimes deep fried, essentially served with a dipping sauce. Nepalis also make momos due to close proximity to Tibet, and much of Nepali cooking is influenced by Indian, Tibetan and Chinese cuisine. Thus, momos also are part of Nepali cuisine. The striking resemblance of Apple Momos to gujiyas or nevriyos is also because of the Indian influence. Nepalis eat momos for breakfast, lunch and dinner. Though they make simple momo skins(Outer cover or patti) with refined flour, salt and water. I added oil to the dough to make it more crisp and crumbly. Nepalis mostly steam the momos and then deep fry them, but I skipped that step, since my recipe is based on the samosa and biscuit rotti recipes for making the outer dough cover. I also made them 1/3 the size of the momos we had eaten in Nepal, since these were made as tea time snack by me.
So folks, what are you waiting for! Don't hesitate when Kudpiraj recommends them and gives you an authentic recipe that's gonna be a sure hit. These Apple Momos will definitely make your kids shout "Wow yummy!" and ask for more. Besides, the fresh apple season is still on.


 Ingredients:
Cooking Apples - 2(250 Gms)
Lemon - 1/2
Butter - 2 Tbsp
Demerara(Brown) Sugar - 3 Tbsp
Cinnamon Powder - 1/4 Tsp
Bread Crumbs - 3 Tbsp
Refined Flour(Maida) - 1.5 Cups
White Sesame Seeds - 2 Tsp
Salt - 1/2 Tsp
Refined vegetable Oil - 3 Tbsp + for deep frying
Water - QS(About 1/2 cup)
Ingredients:
Cooking Apples - 2(250 Gms)
Lemon - 1/2
Butter - 2 Tbsp
Demerara(Brown) Sugar - 3 Tbsp
Cinnamon Powder - 1/4 Tsp
Bread Crumbs - 3 Tbsp
Refined Flour(Maida) - 1.5 Cups
White Sesame Seeds - 2 Tsp
Salt - 1/2 Tsp
Refined vegetable Oil - 3 Tbsp + for deep frying
Water - QS(About 1/2 cup)
Method:
Mix refined flour, salt and sesame seeds.
Add 3 tbsp oil and rub with your fingers to form crumbs.
Add water little by little and keep kneading for 10 minutes to make a stiff but pliable dough.
Make a ball of dough and keep covered for 1-2 hours at room temperature.
Wash and peel apples, remove the core and chop them into tiny bits, squeeze in lemon juice, mix and keep aside.
Melt butter in a pan and add the chopped apples.
Add demerara sugar and sauté for 2 minutes when sugar starts to caramalise.
Sprinkle cinnamon powder and mix well.
After another minute, add bread crumbs, allow the mixture to dry up and then switch off the flame, allow to cool down.
Knead the dough again for a minute and divide into 4 equal parts.
Make a ball of each part, dust with flour, flatten a bit and roll on the kitchen platform work space into a thin sheet.
Shape does not matter, need not look like map of Nepal, but should be easy to be stamped into discs!
With the help of a 3" cookie cutter or a jar lid, stamp out discs.
You can make around 30 such discs.
You can store extra discs packed in a ziploc bag dusted with flour, and freeze them for future use.
Place one teaspoon of the apple stuffing in the center.
Fold the disc into half moon shape and pinch the edges to seal them.
You can either pinch the edges with your fingers to form floral pattern, press with a fork, or even use a momo mould to give shape and design to them.
Make momos like this and keep in the fridge until you fry them.
Heat oil in a deep frying pan/kadai on medium flame.
Reduce the flame to sim, once the oil heats up.
Don't allow the oil to fume.
Drop in 4-5 momos at a time and deep fry on slow heat for 2-3 minutes on both sides.
Once crisp and golden, drain them and serve hot with ketchup or sweet tamarind chutney.
Note:
The outer cover dough should be almost equal in volume, to that of apples.
The dough here is suitable only for deep fried/baked momos.
To make steamed momos, you may skip adding oil and sesame seeds to the dough, and add little more water while kneading.
Ready made samosa/momo moulds are available at major stores in different sizes.
GSBs settled in Northern Kerala, especially in and around Kumble are adept at making some of the most aromatic and delicious seafood preparations. Raaja Gobboru is one among them.
Raaju/Raaja is Mackerel fish in Konkani, Bangude in Tulu and Kannada. Perhaps the name was derived from King Fish, as King fish and Mackerel are close cousins. Gobboru is nothing but ash. The authentic Raaja Gobboru gets slightly burnt while cooking. I think our ancestors named the dish thus, because this curry is not too wet, rather dry and the slow dum cooking with charcoal cinders above and below the pot gives such an impression! Traditionally this should be prepared in earthenware pot on wood or charcoal fire with hot charcoal laid over the lid for even heat transmitted into the curry to almost bake the mackerels, while absorbing the flavours within the masala pretty well .
I have tasted awesome Raaja Gobboru prepared at my friends Kumble Vaman Nayak's home. Vaman's wife makes this perfectly. When I asked her the recipe few years ago, she just gave me a hint that it is made with almost the same masala as Mackerel Kothambari Methi Ghashi, but selection of fish and layering it with masala spread over each layer in the pot is very important.
My grandma(mother's mother) hailed from Kumble, and thus my mother inherited her cooking abilities. She used to make excellent Raaja Kothambari Methi Ghashi. Yet, she never had an idea what Raaja Gobboru was, or maybe she never tried that, since our family was pretty big with over 12 members, and some might not have liked dry curry made with fish those days!
Traditionally they cook fish on very slow heat for an hour almost, adding coconut oil from time to time in small quantities. That's what makes the dish so delicious and different from the conventional GSB curry Kothambari Methi Ghashi. Besides, we are adding oil while cooking fish in this curry, whereas for the other one, we are adding fresh oil after the fish is cooked. Some follow slightly different methods of cooking such as stuffing the whole fish with the masala or roasting the masala in oil first and then making layers with fish and cooking on slow fire. However, final cooking has to be done on slow heat for a long time.
Medium size Mackerel fish is cooked slowly on dum(Sealed pot) in a spicy tangy coriander and fenugreek seed coconut gravy in layers with abundant drizzle of fresh coconut oil. There are different recipes to make this, but I prefer the masala as per ingredients mentioned here below. You can also layer masala and fish, keep it in the oven at 180 C for 20-30 minutes and make it equally tasty. Only drawback here is, you may find it difficult to take the pot out of the oven from time to time, shake the contents and add oil, which is very essential!
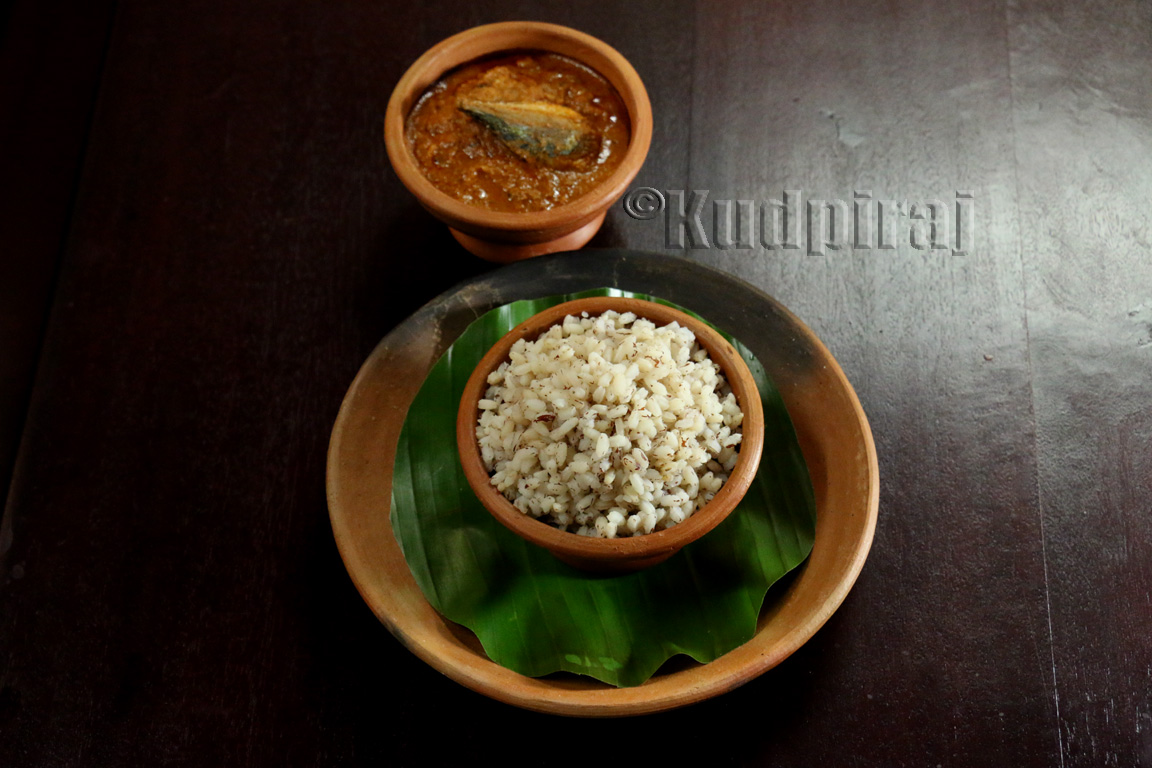
This curry goes well with boiled red rice. Better fry some fish and savour along with this fantastic treat! A glass of cold buttermilk may wash the remaining traces of the curry down into your gastronomy, leaving you feel on top of the world!
Ingredients:
Mackerel Fish - 1 Kg medium size(About 10 Mackerels)
Grated Coconut - 3 Cups(or 3/4 medium size coconut)
Red Short(Ramnadu) Chillies - 8-10
Red Long(Byadgi) Chillies - 8-10
Rock Salt - 1 1/2 Tsp(or table salt 1 1/4 Tsp)
Tamarind - Marble size ball
Coriander Seeds - 2 Tbsp
Fenugreek(Methi Seeds) - 1/2 Tsp
Coconut Oil - 4 Tbsp
Method:
Clean, wash and drain mackerels.
Cut each one into two pieces lengthwise.
Heat 1/2 tsp oil and roast chillies, followed by coriander and fenugreek seeds until a nice aroma emanates.
Powder in the mill and grind along with grated coconut, rock salt and tamarind into a smooth paste, adding just about 1 and 1/2 cup water.
Empty the masala paste into bowl and rinse the mixer jar with 1/2 cup water and reserve this water.
In an earthen pot or a thick bottom wide mouthed pan, drizzle 1 Tbsp coconut oil.
Spread 1/3 of the ground masala paste and arrange half the mackerel pieces in a radial arrangement(Resembling spokes of a wheel).
Top up with second layer of masala and arrange some more pieces over it and drizzle 1 Tbsp oil.
Top up with remaining masala paste and drizzle one more tbsp oil.
Keep on the gas flame, allow to heat up.
As soon as smoke starts to emit from the pot, keep a perforated plate underneath the pot, allow it to get red hot and then simmer gas.
Close the lid, keep some weight on the lid like a mortar or a stone to seal the pot and allow to cook on slow heat for 5-10 minutes.
Open the lid, shake the contents by lifting and rotating the pot in a swivel movement.
Drizzle one teaspoon oil, close the lid, keep the weight and allow to cook for another 10 mins.
Open the lid, shake the contents again, drizzle one more teaspoon oil and close the lid, replace the weight.
Cook for another 10 minutes. open the lid, drizzle remaining oil and mix by again shaking the pot.
Raaja Gobboru is ready.
Serve with steaming hot boiled red rice and choice of fish fry.
Note:
This curry is meant to be thick and dry, almost zero water added while cooking.
For better results, keep some red hot charcoal or burning embers over the lid while cooking on slow heat.
If you want the gravy slightly thin, add just 1/2 cup hot water, not more than that.
You can also add some chopped ginger, onion, green chillies and curry leaves while arranging masala and fish in layers.
You can add 1/2 tsp turmeric powder to the masala paste.
Since this curry is loaded with coconut, it tends to get stale faster.
Once you consume the fresh curry, keep the remaining portion in a fridge and reheat it in a microwave or on slow heat in a pot only when you want to consume it.


 Method: