In Marati, 'Misal' means Mixture. The ever popular Maharastrian street food Misal Paav is a globally popular snack that is also eaten by many for lunch or dinner like Paav Bhaaji. Recently, Meena thought, we have been making various beans and lentils curry with sambar masala for quite some time. Why not try and give this Misal South Indian touch?
She had excellent sambar powder in stock, from Panchmal's shop in Car Street Mangalore and also Huli powder(Mysore sambar powder) brought by her friend Nirmala Urs. Using them, Meena made a delicious Misal or mixed sprouts curry and we had it like they serve Misal Paav in Maharastra.
Needless to say that the combo snack was easy to make and a super hit in its first edition!


Ingredients:
Mixed Sprouts(Moong/Chowra/Daalmot/Peas/Chana) - 200Gms
Oil/ghee - 3-4 Tsp
Garlic(Optional) - 6 flakes chopped fine
Onions - 100 Gms chopped fine
Tomatoes - 100 Gms chopped
Huli Powder(Mysore Sambar Powder) - 2 Tsp
Madras Sambar Powder - 1-2 Tsp
Turmeric powder - 1/4 Tsp
Green chillies - 3 Slit(Optional)
Grated Coconut - A handful
Coriander leaves - A handful chopped
Lemon wedges, Chopped onions, Farsan Mixture - To garnish.
Paav Bun - 8
Butter - 1 Tbsp
Method:
Heat oil/ghee in a pan.
Fry chopped garlic and onions till golden.
Add tomatoes and optional green chillies and fry till oil leaves the sides.
Add turmeric powder, sambar powders and fry for 1 min.
Add the mixed sprouts, little water and salt to taste.
Cover and cook on slow fire till almost done.
Add the grated coconut and cook further for 5 mins.
Garnish with chopped onions, farsan Mixture and coriander leaves
Serve hot with sliced paav bun roasted with butter, and a lemon wedge.


Note:
Any left over Misal can very well be relished with pooris, aapams, idlis, dosas or chapatis.
This is an improved version over Prawn Spicy Green Masala. We used the same green masala paste as we used for prawns. Needless to say this tastes heavenly and finger licking good! Can be served as a starter or as accompaniment.
Ingredients:
Whole White Pomfrets - 400Gms
Lemon - 1+1/2
Salt and pepper
Ginger Garlic paste - 1 Tsp
Shallots - A handful cleaned and chopped
Onion - 1 small cleaned and chopped
Ginger - 1" piece chopped
Garlic - 6 flakes peeled
Green Chillies - 4 cleaned and chopped
Coriander Greens - A handful
Mint leaves - A handful
Green Tomato - 1 small chopped(Reduce lemon squeeze by half if you add this)
Turmeric powder - 1/4 Tsp
Cumin powder - 1/2 Tsp
Oil - 10-15Ml


Method:
Clean wash and drain the pomfrets.
Put gashes on both the sides and marinate with salt, 1/2 tsp pepper and 1/2 lemon squeezed, for 30 mins in the fridge.
Clean, wash and grind the greens with chillies, ginger, garlic, onions and optional green tomato to a fine paste.
Heat oil in a shallow pan, fry ginger garlic paste, followed by the green masala paste till oil leaves the sides.
Add juice of lemon, turmeric powder, cumin powder, about 1/2 tsp pepper and salt to taste.
Place the pomfrets one by one, cover with the masala on both sides and cook for 5-10 mins on slow heat, changing side after 5 min.
Transfer to a platter and serve with lemon wedges and onion slices.
The old Mysore Province has some exotic Muslim cuisine that was perhaps developed by the chefs from Tippu Sultan's kitchen. The Mughalai touch to the tasty biryanis, kebabs, curries, daal and sherwa ensure that the flavour lingers on for hours. Bhoona, Yakhni and Dum style of cooking seal the flavour in the food.
Mysore Biryanis are mostly made with tender broiler Chicken and juicy Chickmagalur lamb. In some places, Bannur mutton is used but Bannur mutton is fat rich. The old Mysore province consisted of Mysore, Bangalore, Kolar, Tumkur, Chitradurga, Shimoga Chickmagalur and Hassan districts. Even today you can find a similarity in the way Muslims cook Biryani in these parts of Karnataka State.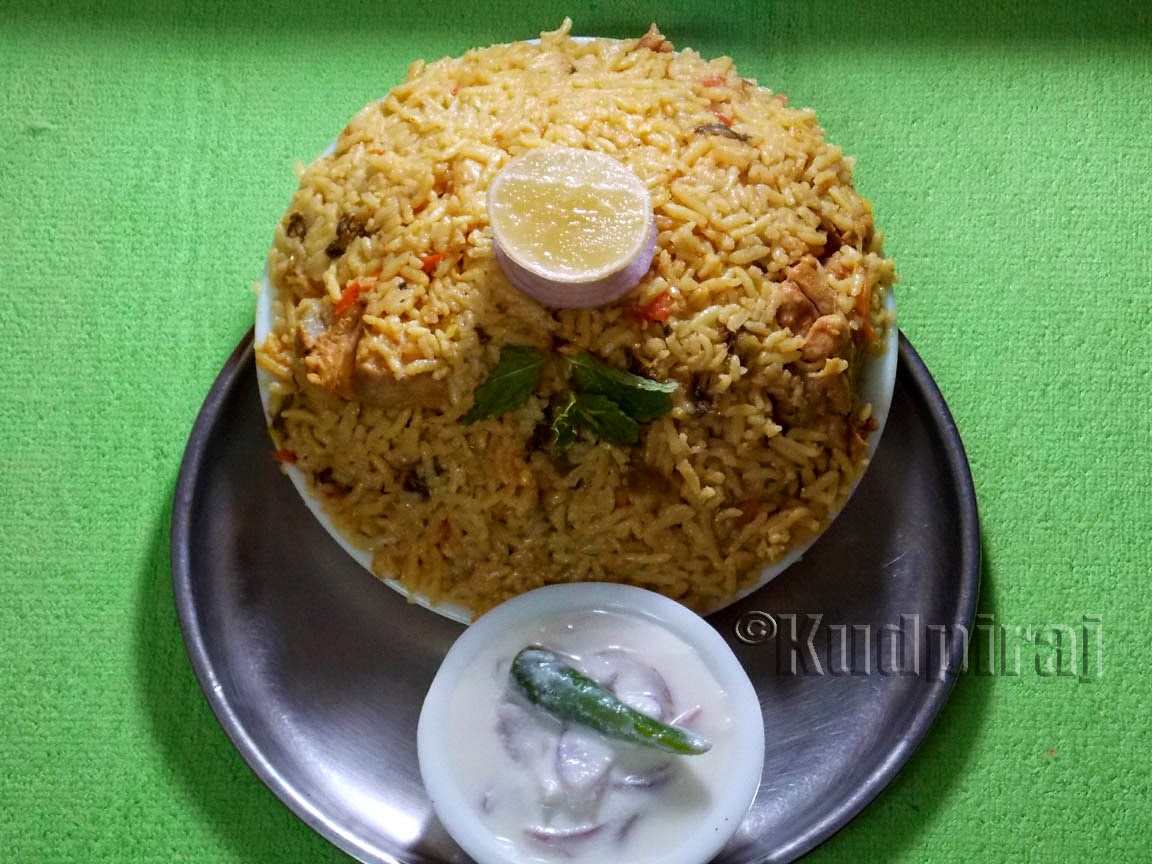
Meena being from Mysore, used to make Chicken and Mutton biryanis the yakhni style as they traditionally make it. After she settled down in Mangalore, for a couple of years she made biryani like that but I was more accustom to dum and bhoona style biryani. Recently I saw a recipe in Vah Chef's channel that is Bangalore Akhni Biryani. The recipe looked similar to Mysore Yakhni Biryani. I asked Meena to follow that recipe. She however, felt more comfortable with her signature biryani, like she used to cook many years ago.
Akhni and yakhni mean the same. Yakhni means meat broth. When meat is cooked along with spices, the thick broth contains all the goodness of the meat, the marrow and of course the fat that comes with it. Calculated quantity of meat is marinated and then cooked along with whole spices and Jeerak Samba or Sannakki rice to get an aromatic biryani in which, each grain of rice absorbs the masala equally and becomes succulent. The meat pieces are soft and juicy and are eaten along with the rice for that heavenly feeling! A generous squeeze of lemon and an accompaniment of spiced daal, sherwa and kachumber makes full justice to this sumptuous meal.


I first tasted such biryani in Chamarajanagar in 1979. They called it mutton palaav and chicken palaav. Some Military Hotels made such biryani. Similar biryani can be found at Imperial on Residency Road, Taj Restaurant, Ghousia Cafe or Renowned City Restaurant in Kalasipalyam or Shivaji Nagar Bangalore, Biryani Paradise in Mysore, Moghul Darbar in Chickmagalur or even at Ghousia Hotel in Koppa. This biryani is not made pungent or too spicy. More importance is given to the generous portion of rice and meat that is served at lower price. These restaurants were started to serve the poor and the middle class people mostly, but one can not miss seeing an expensive SUV or MPV parked in front of these restaurants for lunch or dinner, or even a take away to nearby towns.
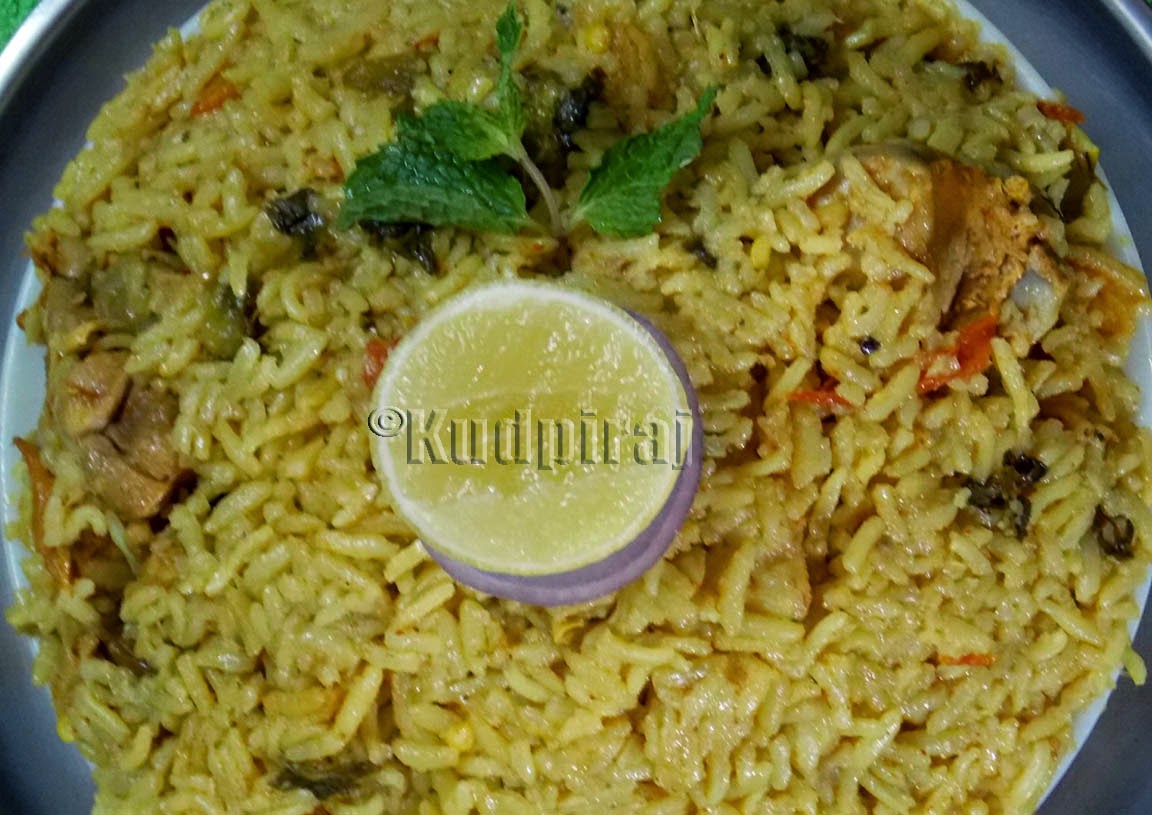
We didn't have Jeerak Samba in stock but we had par boiled Basmati Rice which somebody said is good for making biryani. Meena used that in this recipe. I didn't like the texture of that basmati rice but the biryani tasted very good. At some other date, we plan to make the authentic biryani with sannakki or jeerak samba rice but here's how we made Mysore Yakhni Biryani. This one is easy to make and doesn't require any grinding.
Ingredients:
Broiler Chicken fleshy pieces - 500 Grams cut into medium pieces
Red Chilli Powder - 1-2 Teaspoons(According taste)
Turmeric powder - 1/4 Teaspoons
Rice (Basmati or Jeerak Samba) - 400 Grams(About 2 cups)
Salt - To taste
Lemon - 1
Oil/Ghee - 20+20 Ml
Whole Garam Masala - 3 green cardamoms, 4 cloves, 1" cinnamon, 1 bay leaf, 1 star anise, 2 marata moggu, A pinch of mace, A pinch of nutmeg powder
Onion - 2 sliced thin
Ginger Garlic Paste - 2 Teaspoons
Green Chillies - 3 slit
Tomato - 2 sliced thin
Curd - 1 Tablepoon
Coriander Leaves - A handful chopped
Mint Leaves - A handful chopped


Method:
Marinate the chicken with salt, turmeric powder, chilli powder and 1/2 lemon juice for 30 minutes.
Wash and soak rice for 15 minutes. Drain and keep aside.
Heat 20 Ml Oil in a Large Vessel and fry the whole spices followed by onions with green chilies and 1/4 teaspoon salt till the onions turn golden.
Add Ginger garlic paste and fry well.
Now add the tomato and fry well till the Oil leaves the sides.
Add the chicken with marinade, curd and half portion of coriander and mint leaves.
Fry for 5 minutes.
Add 3 cups of water and bring to a boil.
Now add the soaked drained rice, mix gently, squeeze other half of the lemon, add salt to taste, cover and cook on slow fire for 10 minutes.
Open the lid and sprinkle the remaining Mint leaves and Coriander leaves on top of the rice and drizzle the 20Ml ghee over it.
Close the lid and let it cook for another 10-15 minutes or till all the water has been absorbed by the rice and the rice is properly cooked.
Switch off the flame, keep for 10 minutes and then gently mix the rice and serve with kachumber raita.


Poori Bhaaji is a favourite breakfast snack for not only Mangaloreans but all South Indians. Bhaaji is made in at least half a dozen different ways in Mangalore but his typical South Indian Bhaaji has added grated coconut, making it more yummy.

Meena made this bhaaji after 25 years, since I was reminiscing over my early days when I relished excellent Poori bhaaji at Taj Mahal Cafe, Rama Bhavan(Ayodhya), Madhuvan(Moti Mahal), Welcome Hotel(Karkala old Bus Stand), Bus Stand Canteen(Hampankatta old Bus Stand Mangalore) and at Vijaya Vihar(Chickpet Bangalore). They all added grated coconut in bhaaji which is a rare sight today. Taj Mahal cafe even stuffed their oval shaped masala Dosas with this bhaaji and the dosas tasted different. Welcome Hotel and Bus Stand canteen Poori Bhaaji were the best. It was good when it lasted.
In the early Seventies, my father used to send me to Bus Stand Canteen to get good snacks. There the specialty was Poori Bhaaji. Father's friend Shinna Baalo(M Srinivas Baliga) the owner used to call his favourite waiter and shout "Shivananda bechcha bechcha poori bhaaji korlayaa"(Shivananda, give him hot poori bhaaji). He also used to send me into the kitchen to see if they give freshly fried hot pooris with bhaaji. While we travelled from Mangalore to Shimoga in the mid Sixties, the Jog Express bus used to halt at Karkala Bus Stand at around 11.00AM, where Welcome Hotel welcomed us with excellent Poori Bhaaji. I can still remember the flavour of the bhaaji they served. Blissful days!
It's not too late and you don't miss the goodness of the same bhaaji that Meena made the other day. Follow the recipe and pamper yourself with yet another simple but authentic traditional bhaaji brought to on Garam Tawa.


Ingredients:
Onions - 3 Medium, sliced thin
Potatoes - 2 Medium, boiled peeled and Cubed
Coconut Oil - 2 Teaspoons
Mustard seeds - 1 Teaspoon
Urad(Black Gram) Daal - 1 Teaspoon
Curry Leaves - 1 Sprig
Green chillies - 4 Chopped
Turmeric powder - 1/4 Teaspoon
Salt - To taste
Freshly Grated Coconut - A handful
Method:
In a thick bottomed kadai/wok, heat oil and add mustard seeds.
Allow to splutter and then add black gram daal. Allow to get golden.
Add chopped curry leaves and green chillies and fry well till green chillies look opaque and get dehydrated.
Now add the sliced onions and fry till the onions become slightly golden.
Add turmeric powder and salt, mix well.
Add 1/2 cup water, cover and cook for 2-3 minstill onions are tender.
Now add the cubed boiled potatoes and freshly grated coconut and saute.
Check for salt and serve hot with hot pooris with or without thick coconut chutney.
Here's the Poori recipe.
Recipe courtesy: Sanoor Kavita Kamath
In Konkani Sheeth means cooked rice, polo means dosa and thus, Shitthaa Polo means cooked Rice Dosa.
Mangalorean cooking has many kinds of dosas. Most of the dosas are based on one common ingredient like urad daal to achieve the soft spongy texture. However, there are some recipes which say "Don't use urad daal. You can still get the fluffiness in your dosas adding some other ingredients". I like such recipes, especially when the price of urad daal hits the sky! Jokes apart, here's some good news for those who like simple dosas with great taste and texture.

Our family friend Sanoor Kavita Kamath met my wife Meena at her friend Uma Shenoi's place the other day and as usual, cooking was one of the common interests they all shared. Kavitha passed on a fantastic recipe to Meena, based on which we had a good breakfast today with fluffy soft dosas and coconut white chutney! She also said, these dosas taste very good with chicken curry, garlic or onion red chutney or any spicy curry.
I reminisced over the fluffy saada dosas I tasted in Chamarajpet Bangalore back in 1980 in a small Udupi restaurant with white chutney. That used to be my dinner sometimes. Thus I told Meena, I'd prefer a simple coconut white chutney, so that I can recall my Bangalore days.
You can also add leftover cooked rice to make these dosas but see that the batter has fermented properly, before making dosas.


Ingredients:
Dosa Rice - 1 cup
Cooked Rice - 3/4 cup
Grated Coconut - 1/2 cup
Curd - 1 Tablespoon
Soda Bicarb(Or Eno) - 1/4 Tsp
Salt - To taste
Oil - For roasting dosas.
Method:
Wash and soak dosa rice for 2 hours.
Drain and grind along with cooked rice and grated coconut to a smooth batter.
Add salt to taste, curd and soda bicarb or eno.
Allow to ferment for 6-8 hours at room temperature.
Heat a nonstick dosa tawa, maintain medium heat and spread a ladleful of the batter.
Cover with a dome lid, allow to cook.
Open the lid, drizzle some oil over it and flip the dosa.
Allow to get roasted.
Serve hot with chutney or curry of your choice.
Note:
Eno salt is added if the batter fails to ferment properly in spite of adding soda bicarb.
Very less oil is needed to make this dosa, if the batter has fermented properly..
Mulik is a traditional fried sweet dumpling/fritter usually made in monsoon season when jack fruit is available in abundance in this part of Karnataka. This snack was perhaps developed by Keralites or Malabaris who have mastered the art of preparing sweet dishes with local produce like Banana and Jack Fruit. Jaggery is also used in abundance in Kerala-Karnataka region in sweet dishes. Some people make mulik with bananas as well.


My mother used to make Jackfruit Mulik meticulously, soaking and grinding rice with jack fruit segments and jaggery manually, frying them essentially in pure home made ghee to get that heavenly flavour. We as small boys used to wait patiently and watch mother make them in the kitchen, dive and grab as many as we could, as soon as she fried, drained and dumped 12-15 mulik at a time into the colander!
Now a days, people mostly fry them in coconut oil. You can also fry them in refined sunflower or other available oil but coconut oil again has its own sweet aroma that adds to the flavour of mulik. Some people also add cardamom powder but that mars the original flavour of jack fruit to a great extent and I avoided adding cardamom. I have tasted good Mulik at Hotel Ayodhya, Kusum Restaurant and Balli's Podi Shop in Mangalore.
Shivalli Brahmins make this adding little salt and also sesame seeds. Their preparation is almost like making modak. I prefer mulik with added sesame seeds. Black sesame seeds taste better and I broiled them/roasted them to get a slight crunchy texture after deep frying the mulik. Addition of salt compliments and highlights the taste of otherwise sweet mulik.
We had thick malai from tender coconut in the fridge. One whole malai, about 4mm thick, is sufficient for the following recipe of mulik. Coconut Malai has better taste than fully grown coconut. Locals also call that 'Bannangaayi' and use that in making rice bhakris and neer dosas.
Jack fruits were falling from the tree in our garden due to late yield and effect of monsoon rains. Such jack fruits are not meant for direct consumption. They are usually added in making jack fruit paayasam, steamed dumplings or paattholis. They are just right for making mulik also. The jack fruits from our garden contain more water content and are very sweet. Hence we reduced the amount of jaggery added and increased the amount of rava. Adding grated coconut enhances the taste but don't add too much. Rice powder is added to get a firm spongy texture. Try this recipe, a sure superhit!


Ingredients:
Jack Fruit Florets - 2 cups chopped
Thick Malai from Tender Coconut Chopped/Grated Coconut - 1 cup
Bombay Rava/Semolina - 2 cups(Adjust according to consistency of batter)
Rice Flour - 1/4 cup
Jaggery Powder - 1 cup(Add less if the jack fruit is too sweet)
Salt - 1/2 Tsp
Black Sesame Seeds - 2 tsp
Coconut Oil - For deep frying


Method:
Coarsely grind tender coconut malai/grated coconut to a chutney consistency, without adding water. Keep aside.
Grind jack fruit with jaggery powder without adding water till smooth. Keep aside.
Broil(Dry roast) sesame seeds till crisp. Keep aside.
Mix jack fruit jaggery paste with ground coconut, rava, rice flour and salt.
Keep for 3-5 minutes.
Add sesame seeds and mix well.
The batter should be thicker than idli batter.
Heat oil in a thick kadai and reduce the flame to medium.
Keep a bowl with water for dipping your hand.
Dip your hand into the mixed batter pick, shape and and drop small balls of the batter into hot oil, as many as the hot oil can take.
You can also use a spoon to drop the batter into hot oil.
Fry slowly till the mulik turns golden brown.
Drain and collect in a colander lined with paper for excess oil to get drained.
Serve hot after keeping at room temperature for 5 mins.


Note:
Temperature of the oil should be monitored well. Once you fry a batch, allow the oil to heat up for 1 min and then drop the next batch.
If the muliks turn darker, it is due to excessive sweet content in the batter.
Don't worry about the shape. Sometimes you may get well rounded balls and sometimes slightly out of shape dumplings.
Shape depends on the amount of batter dropped.
Store the remaining mulik in an airtight container, which will stay good for 3-4 days at room temperature.


