The year was 1989, I was at Temple Square Mangaluru, celebrating the annual Okuli following the Car Festival, rejoicing with few friends. My Bank mate and cousin Kudpi Ganesh Shenoy offered me some fried snack which he got from a nearby stall. They looked like nuggets but he said it is 'Bhindi Bajia/Bhenda Bajo/Pakora', a kind of fritters made with chopped Okra and gram flour. I popped couple of them into my mouth and started chewing. I went on chewing them for about 5 minutes, but could not gulp them! I also felt terribly thirsty, and I ran to nearby Soda shop and guzzled down a cold soda to push the stuff down my throat. Then I told my cousin, "I can not forget your favour man! Henceforth I should avoid eating Bhindi Bajia!" He smiled and said they are made like that, with overgrown bhindi. I was shocked to know that, for it was the first time I tasted them in my life, and they were tough and fibrous!
Later, I started visiting Balli's Podi shop where I found better Bhindi Pakoras made with tender okras. I also found very good pakoras at Kusum Caterers' Podi joint in Lower Car Street. I developed a liking for them, and started buying them whenever I visited car Street.
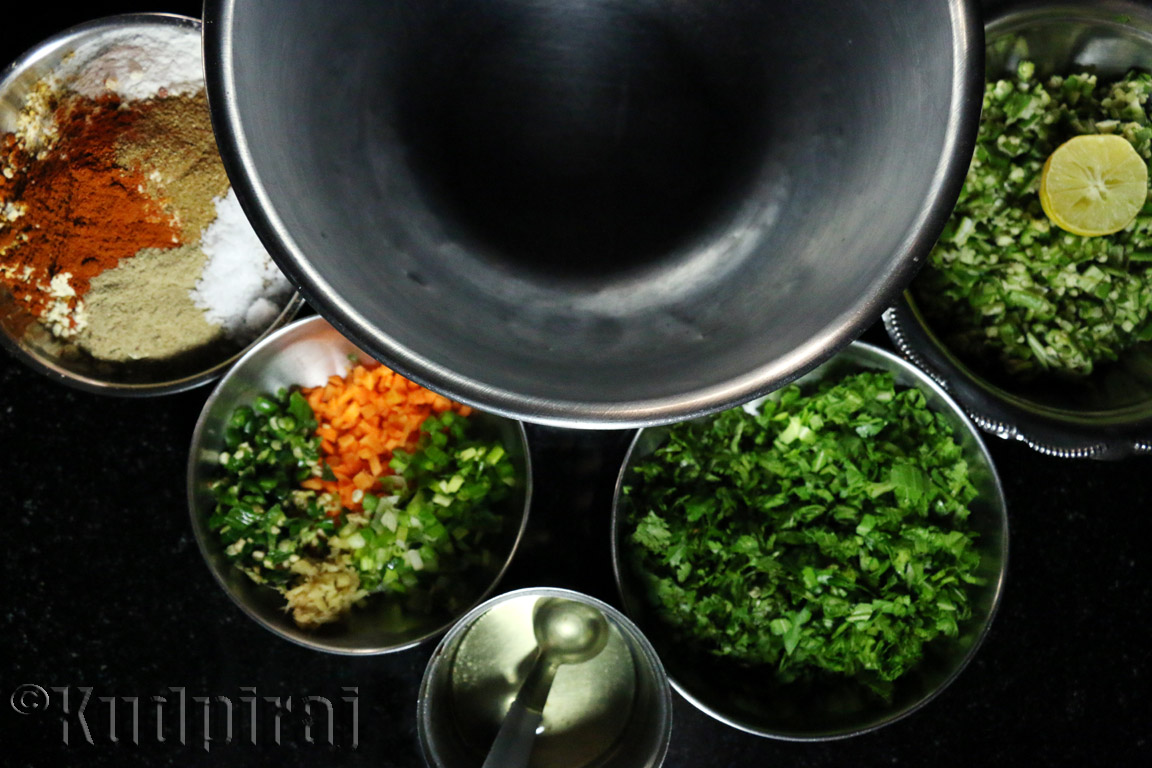
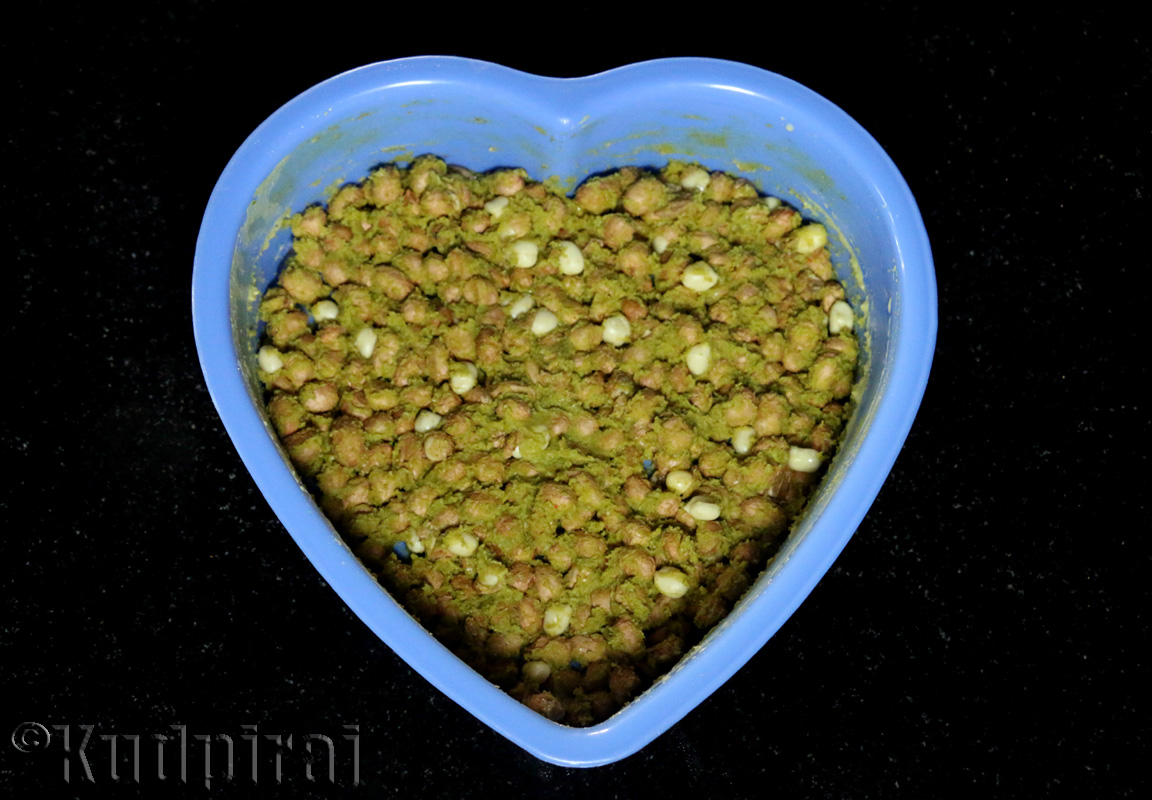
I have been thinking about making Bhindi Pakoras at home the way they make it in car Street, but somehow that plan didn't materialise. The other day Meena had made Bhindi Upkari for dinner, and I asked her if we have some left over bhindi. She said yes, but she had a doubt whether they suffice my requirement in making pakoras. I too found the quantity of bhindi insufficient. Then an idea struck me, and I took out the Bok Choy or Chinese Cabbage and a piece of carrot resting in the fridge. I also took last remaining sprigs of the onion shoot left over from making noodles and Butter Garlic Squid last week. Adding them all together, mixing in some masalas, chillies and coriander leaves, I mixed in gram flour and rice flour to make a stiff dough, which I shaped like croquettes instead of nuggets and deep fried to get an awesome starter snack.
Here is that fantastic snack which tastes almost like seekh kebabs and has lots of flavours. They turn out soft inside and crisp outside, easy to bite into. Not at all chewy like the ones I had on that Okuli day in 1989, I guarantee you! You can serve them with sweet mint chutney or with ketchup if you are having them with cocktails, mocktails, or as a tea time snack. They also taste good when served as a side dish with rice and daalithove.
Ingredients:
Tender Okra(Bhindi) - 1 cup finely chopped
Bok Choy/Cauliflower/Cabbage/Palak leaf - 1 Cup finely chopped
Coriander leaves - 1/2 Cup, finely chopped
Spring Onion Greens(Optional) - 1/4 Cup, finely chopped
Carrot - Grated or finely chopped, a handful
Green Chillies - 3 finely chopped
Ginger - 1/2 Inch finely minced(or ginger paste 1/2 Tsp)
Salt - 1/2 Tsp(or to taste)
Gram Flour(Besan) - 1/2 Cup
Rice Flour - 2 Tbsp
Red Hot Chilli Powder - 1/2 Tsp
Turmeric Powder - 1/8 Tsp
Coriander Powder - 2 Tsp
Cumin Powder - 1/2 Tsp
Chaat Masala - 1 Tsp
Oil - For deep frying
Method:
Heat oil in a deep frying pan until it starts to fume.
Simmer and keep the flame on.
Keep a bowl of water ready.
Take all the chopped veggies in a mixing bowl.
Add the powders and a tablespoon of hot oil.
Mix well, sprinkle two to three tablespoon of water and make a stiff but sticky dough.
Dip your fingers in the bowl of water, take lemon size dough and make a ball.
Shape the ball into a 2" long croquette.
Make 16-18 such croquettes and deep fry 4-5 at a time in hot oil on low flame for 5 minutes or until they turn golden brown and crisp on all sides.
Drain on kitchen paper and serve.
Masala Peanuts is the king of 'Namkeen', a favourite time pass dry fried savoury snack for Indians. We find them in many varieties in stores. Now a days, leading packed snacks manufacturers like Haldiram's and Maiyas market them even in 5 or 10 Rupee sachets. Masala Peanuts used to be my favourite when I watched movies in local cinema halls during our younger times. Vendors used to come with a tray loaded with masala peanuts packed in paper cones, chaklis and crunchy popped rice laddus, shouting "Unde chakkuli masaale kadle....!" Later they started packing them in plastic sachets, load them into tin boxes, stand outside the gate of cinema halls at interval, and sell them for 25 Paise each. I used to buy at least 3-4 such packets for myself in the late Seventies!
Masala peanuts also make a good snack with cool drinks, beer and cocktail. Any bar would be stocked with masala peanuts round the year. We find mostly the red or brown coated ones at most of the places, but my memory dates back to the period 1979-85, when I was working in Chamarajanagar for two years staying at Mysore, and then at Bangalore. There I used to buy green masala coated ones which were very dry, a thin film of green masala clinging to them and they used to be very crunchy and full of flavour. Those were rustic style masala peanuts which one can find in old Bengaluru areas Avenue Road and KR Market. I never found them anywhere after I came down to my home town Mangalore and settled down in 1985.
I wanted to eat such green masala peanuts but those whom I asked didn't know where they are sold. Going to old Bangalore side is difficult for them. I too forgot to look out for them during my later visits. However, the other day I had made excess green chilli paste, and thought I can try making green masala peanuts at home. I didn't want to deep fry them because I had never tried making masala nuts in the microwave so far. Around year 2008 when I first started being active on social networking site Orkut sharing recipes, someone suggested the microwave method of making masala nuts. I also browsed through the net to find many recipes. I however could not find the recipe for green masala nuts. That didn't worry me, as I can formulate many dishes confidently by now!
Here is the end result which looks not quite like the ones I ate in Mysore, Chamarajanagar or Bangalore, but they taste very good. Maybe my next attempt will be to deep fry them and see if they turn out exactly like the ones I ate those days. The peanuts they use are longish, but we get the roundish ones here. They both have difference in the thickness of outer skin. That in turn makes a difference in masala coating. However, something is better than nothing, and I am sharing this lovely recipe with you all.
Ingredients:
Peanuts with skin - 200 Gms
Green Chilli Paste - 2 Tsp
Salt - 1/2 Tsp(Or to taste)
Gram Flour - 1 Tbsp
Rice Flour - 1/2 Tbsp
Cumin Powder - 1/52 Tsp
Coriander Powder - 1/2 Tsp
Turmeric Powder - 1/4 Tsp
Chaat Masala - 1/2 Tsp(Optional)
Refined Oil - 2 Tsp
Method:
Mix all the ingredients together, dry powders first and green chilli paste last.
Sprinkle little water while mixing if you want, and allow the masala to coat the peanuts properly.
The coating should be sticky but not watery.
Spread the coated nuts in a microwave proof plate or bowl.
Microwave at reheating mode for 1 minute.
Take out the bowl and allow to cool down for 5 minutes.
Don't worry about the plain white ones without skin or coating sticking to them, you can pop them into your mouth each time, as you wait patiently for them to cool down.
Return the bowl into the microwave and run for 1 minute.
Repeat the process until the nuts start to crackle.
The whole process should be complete in 5-6 microwave heating cycles.
Microwave for the last time for 1 more minute if you want them slightly toasted.
Spread on a paper or platter, allow to cool down completely.
Separate any nuts sticking to one another and store them in an air tight jar.
I personally like biscuits, that too local bakery made ones. Bakeries used to sell very few kinds of biscuits during my childhood days, and the basic Milk Biscuits and Cashewnut biscuits were very popular. They were crunchy and nice to bite into. Cashewnut Biscuits used to have either a glossy golden surface with cashewnut bits and sugar crystals sticking to them, while the plain milk biscuits had just the glossy surface. Needless to mention, that I used to love them.
When I visited my brother Dr Kamalakanth Shenoy at Rajajinagar Bengaluru in early 1980, he introduced me to OG Variar Bakery that was close to his home. I was fascinated to eat some of the finest biscuits there, that crumbled and melted in the mouth! I later relocated to Bengaluru and was a regular buyer of Milk Biscuits and Cashewnut Biscuits there. I have liked Karachi Bakery Cashewnut and Chai Biscuits as well, but I always wanted to make Variar Bakery Milk biscuits at home.
The other day I was going thorough various recipes for Milk Biscuits and found a good recipe on Vahchef channel that suited my expectation. Having made cookies/biscuits with different formulas, making these milk and cashewnut biscuits was not difficult for me. With single dough, I made two types of biscuits.
So here I go with slight changes that I made to Vahchef's recipe. They turned out very crunchy and tasty as against Vahchef's softer version. I also made the healthier version with whole wheat flour for a change. The recipe given here is with 2 cups of flour for making 20 Milk Biscuits and 20 Cashewnut Biscuits, but you can also make them with one cup flour like I did, if you are on a diet, or if you want them to get consumed within hours!
Ingredients:
Refined Flour(Maida) or Whole Wheat Flour - 2 Cups + 2 Tbsp(For rolling dough)
Salt - 3/4 Tsp
Baking Powder - 2 Tsp
Butter - 120 Gms(Max 140 Gms)
Powdered Sugar - 1 Cup
Custard Powder - 4 Tbsp
Milk Powder - 40 Gms(Optional)
Vanilla Essence - 2 Tsp
Milk - 1/2 Cup + 1 Tbsp(For milk wash)
Cashewnut Bits(1/8 cut) - 25 Gm
Sugar Crystals - 1 Tsp(Optional, for sprinkling on cashewnut biscuits)
Method:
Preheat oven to 180° C.
Sift flour along with salt and baking powder.
Cream butter with powdered sugar by beating well.
Add vanilla essence, custard powder, optional milk powder and beat until the mixture is well combined and smooth.
Add the sifted flour mixture and knead well, adding milk little by little.
If you want, add some more milk or water, but make a soft but non-sticky dough.
The dough must be brittle, and must crumble when you try to break it.
Make two portions of the dough.
Add cashewnut bits to one portion(saving a tablespoonful for sprinkling on top), and knead well.
Make balls out of the two parts of dough.
Flatten, dust with maida and roll on the kitchen work area into 1/3 inch thick sheet.
Sprinkle cashew bits on one of the sheets that has cashewnut bits, and run the rolling pin once to embed the nuts.
Using a spatula or a bread knife, press the edges and shape the sheets into perfect squares.
Make equal size markings and cut each sheet into 20 square pieces.
Arrange the pieces on baking trays lined with butter paper, or on greased trays.
Brush milk on all the squares and sprinkle the optional sugar crystals over the ones with cashewnuts.
Bake at 180° C for 12-15 minutes, or until edges turn golden brown.
Remove and allow to cool on the rack.
Store in an airtight container.